

How to measure for your box order
Everyone has a different method for measuring their books, papers and items for a box. Dimensions can mean different things to different people. Please take a look at our guide before ordering. Measuring correctly ensures that your order is correct.
How to measure correctly step by step
Before you begin, make sure that you have a tape measure or measuring jig to hand. You will also need a copy of our ordering spreadsheet. Alternatively, you can use a blank Excel workbook and copy and paste your information into our sheet when you order.
Place your items on a flat surface. Your item will be in this packaging for the long term, so it is important that you are happy with the position of your items. Take a moment to rearrange loose papers, or slumped volumes if you feel it necessary.

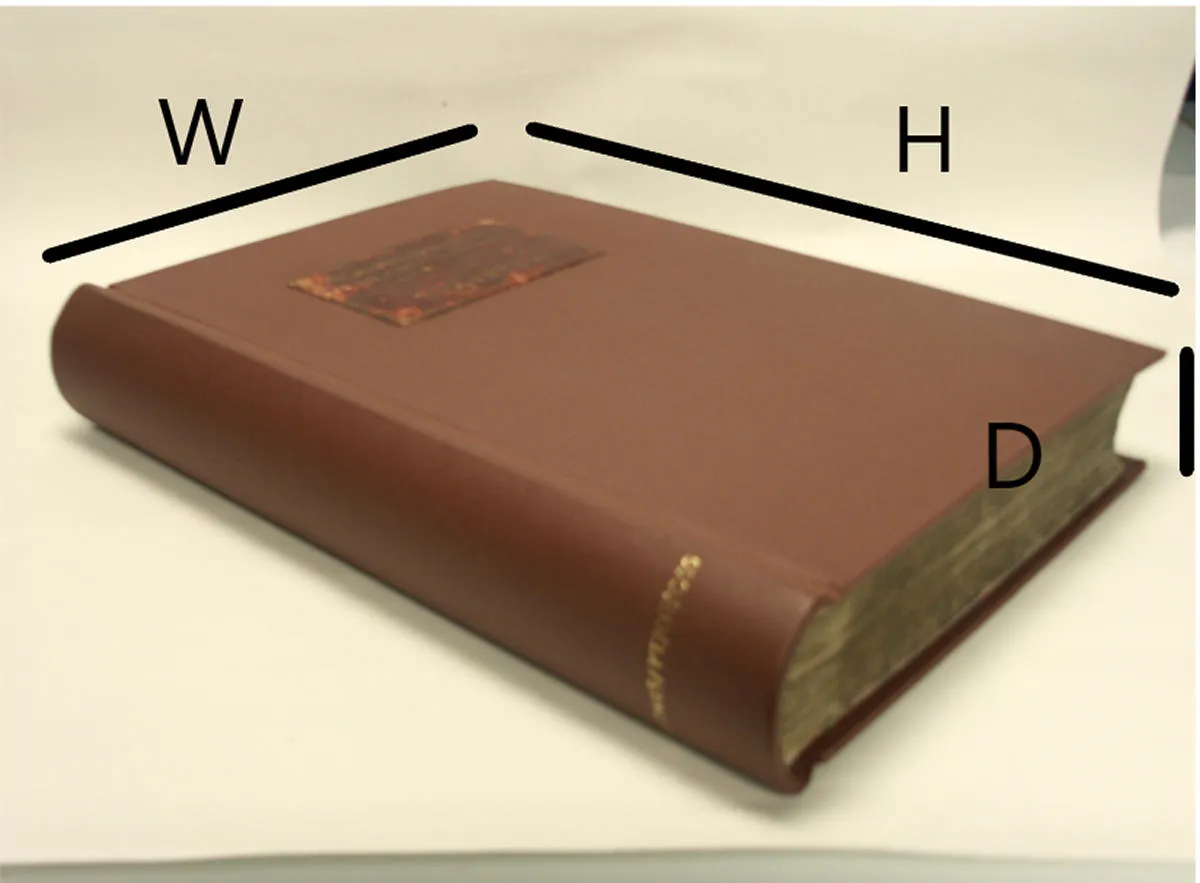
Using either your measuring jig or a tape measure take the total height, width and depth measurements of your item. Please refer to the picture provided to see what we mean by height, width and depth. Please enter measurements in millimetres (mm).

If your item is oddly shaped, has bulging sections or odd pieces that stick out you can use a ruler, piece of stiff card or any other type of straight edge to measure against to make sure that you are taking in the correct measurements.
Our machine is incredibly precise and whatever measurements you provide it will cut to that exact dimension. You should make sure your measurements will give a snug but comfortable fit. For example, you may want to add 2mm to the width of a book with raised bands to prevent them from pressing against the spine, and check that you are not compressing the item too much when measuring the depth. If you are not sure, you can ask for a single box to check the fit before proceeding with a larger order.
When you enter the information on our spreadsheet you will be prompted where to put your measurements. If you are filling in your own ahead of time, you will be able to correlate this across to the form when you download it.